Simple robot arm – move from rosserial to MQTT
In my previous posts from this series, I have used a simple servo based robot arm to learn how ROS and MoveIt could be installed to drive the arm’s movement. In those posts I used ‘rosserial‘ to connect my PC running ROS to the Arduino driving the servos. While it worked OK – connecting the Arduino by a USB cable seemed a little restricting, both physically and architecturally. So I thought I might try and connect the Arduino using MQTT across a WIFI network.
This is a small post that will describe how I got on with this endeavor.
mqtt_bridge
I thought this would be relatively easy, given there was a package available that reported to do what I wanted. mqtt_bridge provides a two way connection between ROS and MQTT. So at a minimum I needed to be able to send the joint positions described in the ‘joint_states‘ topic to MQTT. As it turned out I was unable to get this to work. I was able to get the package installed and send standard simple messages (std_msgs) to MQTT – this was quite simple. The ‘joint_states‘ message is a sensor_msg, which as is does not appear to work with mqtt_bridge. I managed to connect the position from within the joint_states message, but I could not get the correct data flowing. Someone with more experience might be able to get this working. So I gave up.
Make you own
I had a look around and found that it was relatively simple to build a python script that could subscribe to a ROS topic. Also, I new it was simple to connect to MQTT from within python – I had done that before. Even better, I found a script that subscribed to the ROS joint_states topic. It did more than I needed, so I stripped out what I did not need and added the code to connect and publish to MQTT. Surprisingly enough, it was quite easy, and worked as expected. This script is fairly basic – it could do with a bit more error checking, status checking and configuration. However, it works fine for now, and maybe I might enhance it some time in the future. It works in only one direction – (1) subscribes to the ROS joint_states topic, (2) converts the position array to a text string, and then (3) sends to MQTT.
Click on this link to view the script I found that subscribes to joint_states.
To get started I created a new ROS package.
cd ~/ws_servoarm/src

catkin_create_pkg joint_states_listener rospy sensor_msgs

cd ~/ws_servoarm

catkin_make

cd ~/ws_servoarm/src/joint_states_listener
I then defined the message structure by placing the following lines in the srv/ReturnJointStates.srv file. I needed to create this directory and file.
string[] name
---
uint32[] found
float64[] position
float64[] velocity
float64[] effort
I then uncommented the following line in the CMakeLists.txt file.
rosbuild_gensrv()I then put the following code into nodes/joint_states_listener.py. You will need to add the python header line to this file. WordPress got very upset when I included this line to the code block – it thought that I was trying to imbed some malicious code. I also made the script executable.
import roslib
roslib.load_manifest('joint_states_listener')
import rospy
from joint_states_listener.srv import *
from sensor_msgs.msg import JointState
import threading

import paho.mqtt.client as paho
broker="10.0.0.1"
port=1883

#holds the latest states obtained from joint_states messages
class LatestJointStates:

    def __init__(self):
        rospy.init_node('joint_states_listener')
        self.lock = threading.Lock()
        self.name = []
        self.position = []
        self.velocity = []
        self.effort = []
        self.thread = threading.Thread(target=self.joint_states_listener)
        self.thread.start()

    #thread function: listen for joint_states messages
    def joint_states_listener(self):
        rospy.Subscriber('joint_states', JointState, self.joint_states_callback)
        rospy.spin()


    #callback function: when a joint_states message arrives, save the values
    def joint_states_callback(self, msg):
        self.lock.acquire()
        self.name = msg.name
        self.position = msg.position
        self.velocity = msg.velocity
        self.effort = msg.effort
        self.lock.release()
        #store as string
        position_str = ", ".join(map(str, self.position))
        #publish to MQTT
        ret= client1.publish("servoarm/move", position_str)

#def on_publish(client,userdata,result):
#def on_connect(client,userdata,result):

#set & connect to MQTT
client1= paho.Client("control1")
#client1.on_publish = on_publish
#client1.on_connect = on_connect
client1.connect(broker,port, 60)

#run
if __name__ == "__main__":

    latestjointstates = LatestJointStates()
    print ("Ready - listening to ROS and connected to MQTT")
    rospy.spin()
The code is pretty straight forward but if you have any questions or have some suggestions – please leave these in the comments below. Click on this link if you wish to download the script. The following command launches the script.
chmod +x nodes/joint_states_listener.py

cd ~/ws_servoarm

rosrun joint_states_listener joint_states_listener.py
As I have done with all the other command lines in this series, I have added this command to a bash script (mqtt.sh) to make it easier to execute.
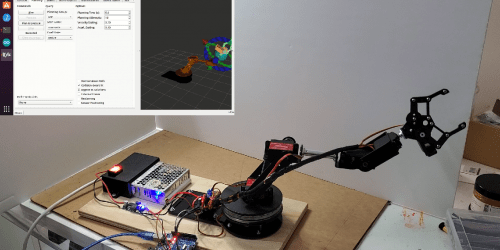
I used an MQTT client app on my iPad (MQTTool) to subscribe to the MQTT messages to check that it actually works. I moved the robot arm around in the RViZ simulator, and I could see the corresponding messages appear on the MQTT queue.
Clearly you need access to a MQTT server. I happen to have Raspberry Pi running Home Assistant for home automation, which has a MQTT server running on it. I used that server. It is mosquito which is a very common Linux based MQTT server. There are plenty of web sites that describe how to install this. There are also a number of cloud based MQTT servers available.
I could have installed mosquito on the virtual machine that I am running ROS on, but that would mean that I would need to set up external network access into the virtual machine. That is more work than I wish to contribute. Anyway, there are plenty of options to getting access to a MQTT server.
I plan to add a back message capability from MQTT to ROS, in the future. This will enable me to initiate control of the robot from outside of ROS.
Connecting the Arduino
I have used a NodeMCU to drive the robot arm, which is an ESP8266 based Arduino. This microcontroller is standard Arduino compatible with WIFI support built in. I had a spare one of these in my spare parts container.
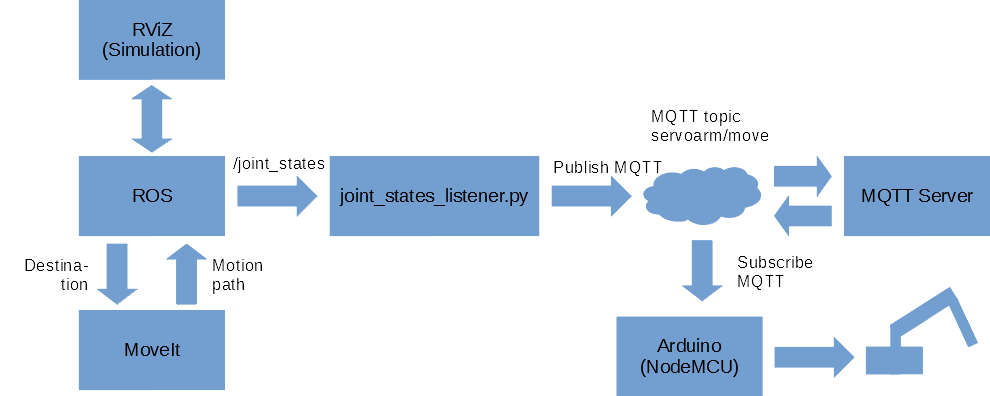
The following diagram shows how all the bits are connected.

The Arduino code is quite straight forward. It maintains a connection to both the WIFI and the MQTT server, and subscribes to the servoarm/move topic on the MQTT queue. When a message arrives, It unpacks the string based message into an array, which it then converts from radians into degrees, and sends to the servo controller over the I2C interface.
Click on this links to download the Arduino code or you can copy from the panel below.
#include <ESP8266WiFi.h>
#include <PubSubClient.h>
#include "Wire.h"
#include <Adafruit_PWMServoDriver.h>

#define MIN_PULSE_WIDTH 650
#define MAX_PULSE_WIDTH 2350
#define FREQUENCY 50

Adafruit_PWMServoDriver pwm = Adafruit_PWMServoDriver();

#include "Arduino.h"

const char * ssid = "[WIFI NETWORK ID]";
const char * password = "[WIFI PASSWORD]";
const char * mqtt_server = "[MQTT SRVR ADDRESS]";
const char * MQTT_USER = "[MQTT USER NAME]";
const char * MQTT_PASSWORD = "[MQTT PASSWORD]";
String payload_str_old = "xxx";
float joint[7];
int servoDegree[6];
int initServos = 1;

// Define Motor Outputs on PCA9685 board
int motorBase = 0;
int motorSholder = 1;
int motorElbow = 2;
int motorWrist = 3;
int motorPivot = 4;
int motorJaws = 5;

// Define servo positions
double mtrDegreeBase;
double mtrDegreeSholder;
double mtrDegreeElbow;
double mtrDegreeWrist;
double mtrDegreePivot;
double mtrDegreeJaws;

WiFiClient espClient;
PubSubClient client(espClient);

//Setup wifi connection
void setup_wifi() {
  delay(10);
  Serial.println();
  Serial.print("Connecting to ");
  Serial.println(ssid);
  WiFi.begin(ssid, password);

  while (WiFi.status() != WL_CONNECTED) {
    delay(500);
    Serial.print(".");
  }

  randomSeed(micros());

  Serial.println("");
  Serial.println("WiFi connected");
  Serial.print("IP address: ");
  Serial.println(WiFi.localIP());
}

//MQTT message callback
void callback(char * topic, byte * payload, unsigned int length) {
  int i = 0;
  String payload_str = "";
  for (int i = 0; i < length; i++) {
    payload_str += (char) payload[i];
  }
  if (payload_str != payload_str_old) {
    int payload_len = payload_str.length() + 1;
    char payload_array[payload_len];
    payload_str.toCharArray(payload_array, payload_len);
    sscanf(payload_array, "%f, %f, %f, %f, %f, %f, %f", &joint[0], &joint[1], &joint[2], &joint[3], &joint[4], &joint[5], &joint[6]);
    mtrDegreeBase = trimLimits(radiansToDegrees(joint[0]) - 90);
    mtrDegreeSholder = trimLimits(radiansToDegrees(joint[1]));
    mtrDegreeElbow = trimLimits(radiansToDegrees(joint[2]) + 90);
    mtrDegreeWrist = trimLimits(radiansToDegrees(joint[3]) + 90);
    mtrDegreePivot = trimLimits(radiansToDegrees(joint[4]) + 180);
    mtrDegreeJaws = trimLimits(radiansToDegrees(joint[5]));

    Serial.print(mtrDegreeBase);
    Serial.print(", ");
    Serial.print(mtrDegreeSholder);
    Serial.print(", ");
    Serial.print(mtrDegreeElbow);
    Serial.print(", ");
    Serial.print(mtrDegreeWrist);
    Serial.print(", ");
    Serial.print(mtrDegreePivot);
    Serial.print(", ");
    Serial.println(mtrDegreeJaws);

    moveMotorDeg(mtrDegreeBase, motorBase);
    moveMotorDeg(mtrDegreeSholder, motorSholder);
    moveMotorDeg(mtrDegreeElbow, motorElbow);
    moveMotorDeg(mtrDegreeWrist, motorWrist);
    moveMotorDeg(mtrDegreePivot, motorPivot);
    moveMotorDeg(mtrDegreeJaws, motorJaws);
  }
  payload_str_old = payload_str;
}

//Maintain connection to MQTT
void reconnect() {
  while (!client.connected()) {
    Serial.print("Attempting MQTT connection...  ");
    // Create a random client ID
    String clientId = "Servoarm-";
    clientId += String(random(0xffff), HEX);
    if (client.connect(clientId.c_str())) {
      Serial.println("connected");
      client.subscribe("servoarm/move");
    } else {
      Serial.print("failed, rc=");
      Serial.print(client.state());
      Serial.println(" try again in 5 seconds");
      delay(3000);
    }
  }
}

void setup() {
  Serial.begin(115200);

  setup_wifi();
  client.setServer(mqtt_server, 1883);
  client.setCallback(callback);

  // Setup PWM Controller object
  pwm.begin();
  pwm.setPWMFreq(FREQUENCY);
}

void loop() {
  // Set robot safe start position
  if (initServos == 1) {
    moveMotorDeg(90, motorBase);
    moveMotorDeg(146, motorSholder);
    moveMotorDeg(24, motorElbow);
    moveMotorDeg(3, motorWrist);
    moveMotorDeg(0, motorPivot);
    moveMotorDeg(0, motorJaws);
    initServos = 2;
  }

  if (!client.connected()) {
    reconnect();
  }
  client.loop();
  delay(50);
}

// Function to move motor to specific position
void moveMotorDeg(int moveDegree, int motorOut) {
  int pulse_wide, pulse_width;

  // Convert to pulse width
  pulse_wide = map(moveDegree, 0, 180, MIN_PULSE_WIDTH, MAX_PULSE_WIDTH);
  pulse_width = int(float(pulse_wide) / 1000000 * FREQUENCY * 4096);

  //Control Motor
  pwm.setPWM(motorOut, 0, pulse_width);
}

// Convert radians to degreees
double radiansToDegrees(float position_radians) {
  position_radians = position_radians * 57.2958;
  return position_radians;
}

// Sometimes servo angle goes just above 180 or just below 0 - trim to 0 or 180
double trimLimits(double mtr_pos) {
  if (mtr_pos > 180) {
    mtr_pos = 180;
  }
  if (mtr_pos < 0) {
    mtr_pos = 0;
  }
  return mtr_pos;
}One thing I did add to the Arduino code is to set a safe start position. I found that when I powered the robot arm on, it would swing to all sorts of random positions before the Arduino connected to the wifi, then connected to MQTT and then got the first position message from ROS. It was pretty scary and quite unsafe. So, the first thing the code does straight after initial setup is to set a safe position for the arm before it gets the first position message. This makes the startup far less dramatic.
Surprisingly enough after all of this – when I moved the robot arm in the RViZ simulator, the robot actually moved. I set up the code so that it only sends a message if it is different from the previous message, which seems to make the arm more stable than in the previous post.
Conclusion
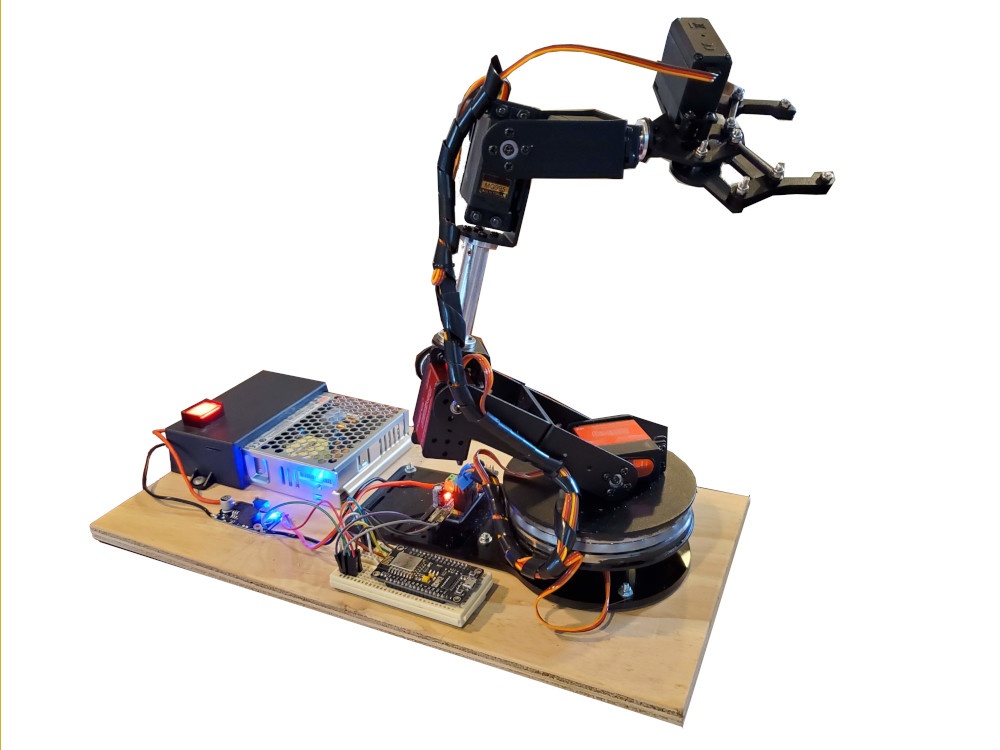
In this post I have managed to write some code to subscribe to ROS and post the joint positions to MQTT. The robot arm Arduino subscribes to the MQTT across WIFI and drives the robot arm. As you can see from the image below there is a lot less clutter and certainly less wires.

I also tightened up all the joints and put a cover and switch over the power supply. It still occasionally develops a small resonate sway, which generally stops by it self. I need to check if any filtering on the power supply is needed.
However, I am quite happy that it works far more smoothly now. In the next post I intend to write a python program to actually do something with the robot arm. I will probably get it to pick and stack some blocks. Not that exciting, but it should provide the next learning experience in my journey to learn ROS and MoveIt.


thank you very much